,

Image Clipping Path Services vs DIY | Pros & When to Outsource

Image Clipping Path Services

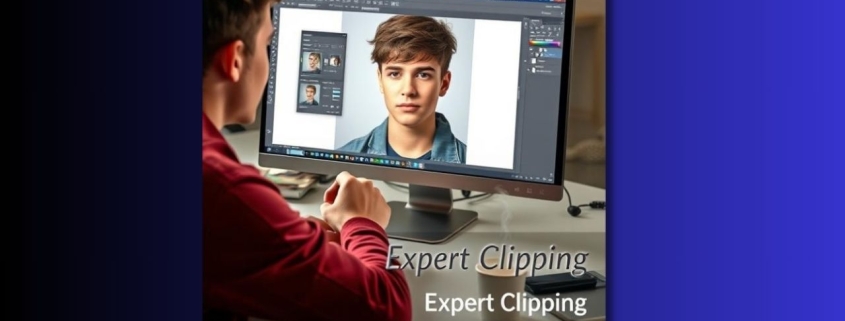
Imagine trying to cut out a picture from a magazine with shaky hands and blunt scissors—that’s kind of what DIY image editing can feel like. Now picture handing it over to a skilled artist with precision tools. That’s the difference professional image clipping path services make.

Whether you’re an e-commerce seller drowning in product photos, a photographer chasing perfection, or a design agency juggling deadlines, choosing between DIY and outsourcing can be a game-changer. Let’s break down the when, why, and how of both options while giving you a real feel for what brands like Expert Clipping can do.

What is a Clipping Path Service and Why It Matters

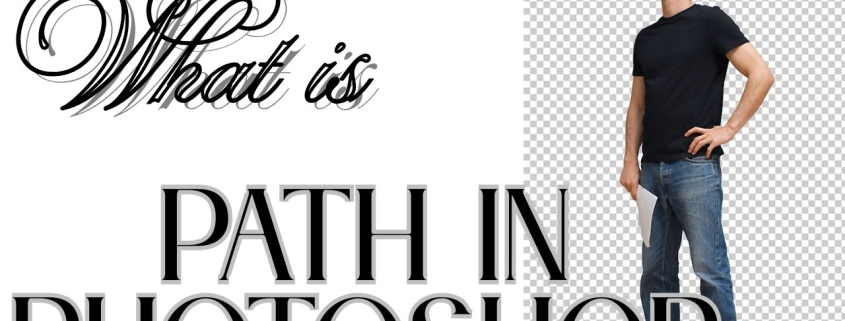
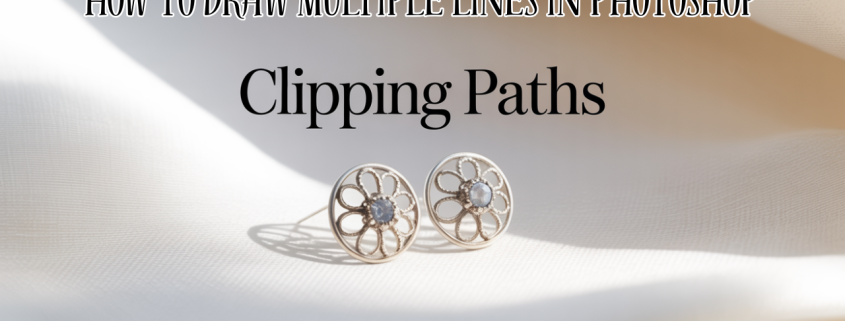
A clipping path is a closed vector path or shape used to cut out an image from its background. Think of it as a pair of digital scissors.

Without it, your product photo could look unprofessional or blend poorly with your website design. Clipping path services are essential for e-commerce, advertising, catalogs, and print design.

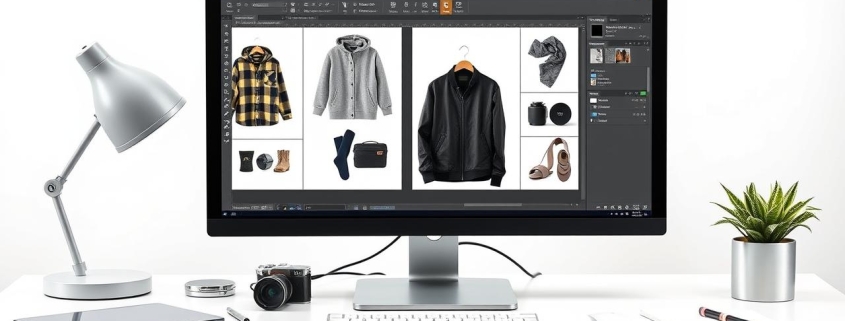
The Role of Clipping Path in E-Commerce Success

E-commerce thrives on visuals. Clean, background-free product photos sell better. Here’s how image clipping path services help:

  • Consistency across product listings.
  • Increased conversions through better presentation.
  • Faster load times with optimized files.

👉 Expert Clipping offers services tailored for Shopify, Amazon, and WooCommerce.

Types of Clipping Paths Explained

Type Description Ideal For
Simple One object with smooth edges Phones, bottles
Complex Multiple curves and holes Jewelry, furniture
Compound Multiple objects in one photo Apparel sets, food plates

Manual Clipping Path vs. AI: Which is Better?

AI is fast—but it’s not always precise. Manual paths, drawn by trained designers, handle complex edges like hair and fine jewelry better.

Pro Tip: For bulk e-commerce edits, Expert Clipping uses a hybrid model—AI for speed, human eyes for quality.

Real Costs of Professional Services

Pricing varies based on complexity:

Service Level Estimated Cost (Per Image)
Simple $0.49 – $0.99
Medium $1.00 – $2.00
Complex $2.50 – $5.00

💡 Get Instant Cost Estimate with Expert Clipping’s pricing calculator.

File Formats & Output Options

Top formats supported:

  • JPG
  • PNG (with transparency)
  • PSD (layered)
  • TIFF
  • SVG

You can request your desired output dimensions and background (white, transparent, or custom).

Turnaround Time: What to Expect

Most services deliver in 12–48 hours depending on volume.

📣 Expert Clipping guarantees:

  • 12-hour delivery for urgent tasks
  • 24/7 support availability

High-Volume Editing: Can It Be Fast & Accurate?

Yes—with the right team.

Companies like Expert Clipping process 5,000+ images/day, maintaining accuracy with team segmentation and double-check protocols.

Why Outsourcing Can Be a Lifesaver

DIY challenges:

  • Time-consuming
  • Risk of inconsistency
  • Need for expensive software

Outsourcing benefits:

  • Speed
  • Scalability
  • Professional polish

🎁 Request Your First 3 Images Free → Try before you subscribe.

Top Providers in 2025: Who Leads the Pack?

Company Specialty Trustpilot Rating
Expert Clipping Bulk edits, 24/7 support ⭐ 4.9
Pixelz AI + human review ⭐ 4.6
Path Edits Low-cost, simple edits ⭐ 4.5
Offshore Clipping Jewelry & fashion ⭐ 4.4
Clipping Path Studio Ecommerce brands ⭐ 4.3

Choosing the Right Partner for Your Business

Ask yourself:

  • Do they offer free trials?
  • What’s the average turnaround?
  • Can they handle bulk orders?
  • Do they sign NDAs?

Expert Clipping checks all these boxes.

Best Value-for-Money Clipping Path Services

If you need affordability without sacrificing quality, here are the best options:

Company Starting Price Free Trial?
Expert Clipping $0.49
Path Edits $0.39
Pixelz $0.59 Limited
UK Clipping $0.50

Customer Support & Delivery: 24/7 Options

Expert Clipping and Pixelz offer round-the-clock chat and email support, making them perfect for global clients across time zones.

Bulk Editing with Expert Clipping

Need to edit thousands of product images?

📉 Subscribe & Save on Bulk Editing:

  • Tiered discounts
  • Dedicated account manager
  • Custom workflows

Extra Services: Shadows, Color, Vector & More

Add-ons you can request:

  • Drop shadows
  • Natural reflections
  • Color correction
  • Ghost mannequins
  • Image masking
  • Vector conversion

All offered by Expert Clipping in one dashboard.

Our Customer Reviews

⭐⭐⭐⭐⭐ “Expert Clipping helped us rebrand our entire Shopify store. The turnaround time was incredible!”
Lina R., Fashion Brand Owner

⭐⭐⭐⭐⭐ “As a photographer, I’m picky. But these guys nailed it—every strand of hair was perfectly clipped.”
Jake M., Commercial Photographer

⭐⭐⭐⭐ “Affordable and reliable. I use them for my Amazon FBA listings regularly.”
Mohammad A., Online Seller

Security, Scalability & NDAs

Key features to demand:

  • NDA agreements
  • GDPR compliance
  • Secure file transfers
  • Scalable for enterprise

Expert Clipping offers custom SLAs and enterprise integration.

Conclusion: When Should You Outsource?

If you’re spending more time editing than growing your business, it’s time to outsource.

DIY works for passion projects and one-off edits.
Professional services shine when speed, scale, and precision matter.

📩 Request Your First 3 Images Free with Expert Clipping
📊 Get Instant Cost Estimate with our pricing tool

FAQs

01. Is a clipping path the same as background removal?
Not exactly. A clipping path is used to cut out objects, which is one way to remove the background but masking is better for hair and fine edges.
02. Are AI tools like remove.bg good enough?
For simple edits, yes. But for pro-quality, AI often misses small details, especially on complex edges.
03. Can I request custom edits like color change or shadow effects?
Absolutely! Most services, including Expert Clipping, offer add-ons like shadows, color correction, and reflections.
04. What’s the fastest delivery time available?
Some companies offer 6–12 hour express delivery. Expert Clipping offers rush edits with dedicated support.
05. Is it safe to share images with online editors?
If the provider uses secure channels and NDAs (like Expert Clipping), your images are safe.

,

How to Create a Path in Photoshop

How to Create a Path in Photoshop

Let’s Get Real Paths Can Be Scary (But They Don’t Have to Be)

I remember the first time I opened Photoshop and tried using the Pen Tool. It felt like trying to write with my left hand while blindfolded. The anchor points, the weird little handles, the curves it all looked so technical.

But here’s the truth: creating a path in Photoshop is easier than it looks and once you get it, it’s like riding a bike. You won’t want to go back.

Quick answer: A path in Photoshop is a flexible line or shape you create using the Pen Tool to outline, clip, or isolate parts of an image. This technique is essential for services like clipping path services, where precise outlines make or break the final output.

What’s a Path Anyway?

Think of a path as the skeleton of your edit. It doesn’t show up in your final image unless you want it to. But it gives you the structure to clip, mask, or select anything precisely.

Short version: A path is a vector outline you can save, edit, and turn into a selection anytime. This foundational step plays a big role in professional image editing, especially when working with a clipping path service provider.

I like to compare it to tracing paper. You’re not drawing on the image—you’re drawing over it.

Why Should You Care About Paths?

I used to rely on the Magic Wand tool to cut out products, but it always left weird jagged edges. Total nightmare. When I learned to use paths, everything changed. My cut-outs became clean. Professional. No more awkward halos or missing pixels.

TL;DR: Paths give you control, accuracy, and clean edges—especially useful for product photography and graphic design. It’s what sets a true clipping path service company apart from the rest.

The Pen Tool Your New Best Friend

If paths are the skeleton, the Pen Tool is your chisel. It lets you carve out shapes, one point at a time. Sounds intense? It’s not. Let’s break it down.

Pen Tool Variations (and When to Use Them)

Here’s what you’ll find in the Pen Tool family:

  • Standard Pen Tool – Best for full control.
  • Curvature Pen Tool – Makes curves smoother for beginners.
  • Freeform Pen Tool – Good for fast, loose outlines.
  • Add/Delete Anchor Point Tools – Used to edit your path later.
  • Convert Point Tool – Helps you switch between curves and corners.

Tip: Start with the Standard Pen Tool. It gives you full control and helps you learn faster.

Before You Click Set Up Your Workspace

When I forget to set things up first, I usually mess up halfway through. Save yourself the headache.

1. Open and Duplicate Your Image

Always work on a duplicate layer. That way, if things go sideways, you still have the original.

Shortcut: Ctrl+J (Cmd+J on Mac) duplicates your layer instantly.

2. Enable the Paths Panel

Go to Window > Paths to open the panel. It’s where all your paths will live.

Pro tip: This panel is your control room for managing saved paths.

Let’s Create Your First Path – Step by Step

Here comes the fun part. Stick with me—I promise it’s not as hard as it looks.

Step 1: Choose the Pen Tool

Just press P on your keyboard or click it in the toolbar. In the top bar, make sure “Path” is selected not Shape or Pixels.

Snippet-ready tip: Always select “Path” in the options bar before drawing, or you’ll end up drawing shapes.

Step 2: Click to Drop Anchor Points

Click once to drop your first point. Keep clicking to form straight lines. Each point becomes a corner unless you curve it.

Think of anchor points like nails in a string art project you’re building the outline one point at a time.

Step 3: Drag to Create Curves

Want a curve? Click and drag instead of just clicking. You’ll see little handles appear—these bend your path like rubber bands.

Snippet version: Click-drag to create curves with the Pen Tool. Handles let you shape the curve’s direction.

Step 4: Close the Path

Finish by clicking the first point again. You’ll see a tiny circle appear this means you’re about to close the shape.

Real talk: Don’t stress about perfection. You can edit every point later.

Oops! Made a Mistake? Here’s How to Fix It

I’ve accidentally clicked the wrong spot more times than I can count. The good news? Everything is fixable.

Use the Direct Selection Tool

Press A to grab the white arrow tool. This lets you move individual anchor points.

Fast fix: Select and drag any point to adjust it—no need to redraw the whole thing.

Convert Points for More Control

Want to turn a smooth curve into a sharp corner? Use the Convert Point Tool. Click to change the type of anchor point.

Snippet: Convert anchor points to switch between curves and corners without redrawing.

Don’t Forget to Save Your Path

This is where most beginners slip up. If you don’t save it, it’s gone.

Save It in the Paths Panel

Double-click the “Work Path” in the Paths Panel. Name it something useful like “Product Outline.”

Important: If you don’t save your path, Photoshop will delete it when you make a new one.

Turn It Into a Selection

Once you’re done, click Load Path as Selection (the dotted circle icon). Now it’s ready to mask, delete, or fill.

TL;DR: Save your path and load it as a selection when you’re ready to use it.

Common Mistakes (I’ve Made Them Too)

Let me save you some trial and error. These are the top slip-ups I see (and have made).

Using Too Many Anchor Points

When I first started, I thought more points = more control. Nope. It just made everything lumpy and hard to fix.

Rule of thumb: Use the least number of points possible. Fewer points = smoother paths.

Related Resource: If you’re editing apparel shots, don’t miss our ghost mannequin services for a clean, invisible mannequin effect. Or check out our product photo retouching to polish your final images.

Skipping Path Names

Naming things matters. Especially when you have more than one path. Don’t be “Untitled Path 37” guy.

Quick win: Name your path as soon as you save it. Saves time later.

Want to Get Fancy? Here Are Some Pro Tips

Zoom in for Precision

Use Ctrl + (+) to zoom in close when placing points. It’s easier to follow fine edges.

Real-world advice: Good paths are made at 300% zoom—not 100%.

Use Guides and Rulers

Enable rulers from View > Rulers, then drag out guides. It helps keep things straight and even.

Combine Paths for Complex Shapes

Hold Shift while using the Pen Tool to add to an existing path. You can even subtract shapes for cut-outs.

Snippet-ready tip: Shift+click to add to a path; Alt+click to subtract.

Wrapping It All Up

Learning how to create a path in Photoshop is like learning to tie your shoes. It feels clumsy at first. But soon, it’s second nature.

Paths give your work a polished, professional edge. Whether you’re editing product shots, designing logos, or just cleaning up a background, this one skill opens a whole world of creative control.

Trust me once you get it, you’ll never go back to quick-selection tools.

FAQs

1. What exactly is a path in Photoshop?

A path is a vector line or shape used to outline, clip, or mask parts of an image without losing quality.

2. Is the Pen Tool the only way to create paths?

Mostly yes, but you can also use the Shape Tools or Freeform Pen Tool to build paths.

3. Can I use paths for text?

Yep! Use the Type Tool and click near a path. The text will wrap around it like magic.

4. Are paths better than selections?

Absolutely—for precision work. Paths don’t pixelate and are 100% editable.

5. How do I edit a saved path?

Use the Direct Selection Tool (A) to adjust anchor points. You can move, delete, or reshape them anytime.

How to Make a Path in Photoshop

How to Make a Path in Photoshop

So, you’re sitting in front of your computer, staring at Photoshop, wondering how on earth to “make a path.” I’ve been there. The first time I heard the word path, I thought I was about to go hiking.

Turns out, making a path in Photoshop is way easier than hiking. And no blisters.

Let’s break it down, step-by-step, in a way that actually makes sense even if you’ve never touched the Pen Tool in your life.

What Is a Path in Photoshop? (And Why Should You Care?)

A path in Photoshop is like a wireframe outline. You can shape it into anything—straight lines, curves, weird custom shapes. And here’s the magic: it doesn’t lose quality when you scale it.

Short answer? A path is a flexible outline you can use for selections, masks, or drawing precise shapes.

So whether you’re cutting something out, adding a smooth edge, or designing a logo, paths are the unsung heroes behind the scenes.

Let’s Talk Tools: What You’ll Use to Make Paths

Before we dive in, you need to know what tools actually create paths. Luckily, Photoshop gives you options.

Pen Tool: Your New Best Friend

Think of this as your scalpel precise and powerful. The Pen Tool lets you drop anchor points and draw both straight lines and curves. It’s the go-to tool for making professional paths.

Quick tip: Tap P on your keyboard. That’s the shortcut to summon this guy.

Freeform Pen Tool: For the Doodlers at Heart

More of a free spirit? This tool lets you draw paths by hand, and Photoshop will clean up the anchor points for you. It’s less precise than the standard Pen Tool but fun for quick sketches.

Shape Tools: Geometry Meets Design

Want a circle? A square? A star? The Shape Tools make perfect geometric paths in seconds. Just remember to switch from “Shape” to “Path” mode in the top toolbar.

Okay, Let’s Make a Path Together

Alright, now comes the fun part actually making a path. Don’t worry, I’ll walk you through it like we’re sitting side by side.

Step-by-Step with the Pen Tool

  1. Choose the Pen Tool (press P).
  2. Make sure “Path” is selected in the top bar (not “Shape” or “Pixels”).
  3. Click to add points along the edge of what you’re outlining.
Drawing Straight Lines

Click once to start. Click again somewhere else. Bam! Straight line.

Want a triangle? Click three times in different spots, then loop back to the starting point. Photoshop connects the dots like a game of connect-the-stars.

Adding Smooth Curves

Click once, then click and drag the second point. You’ll see handles pop out—those let you control the curve. It’s a bit like bending a wire hanger into the shape you want.

Quick win: Practice curving around a coffee mug image. It’s oddly satisfying.

Using the Shape Tool for Fast Paths

Want a quick oval or rectangle path?

  1. Choose a Shape Tool (like Ellipse Tool).
  2. Up top, set the mode to “Path.”
  3. Click and drag to draw your shape.

Now you’ve got a perfect, editable path in seconds. Nice, right?

Editing Paths Without the Headache

Ever draw something, then wish you could tweak it a bit? Yep, same with paths.

Moving Points Around (Like Rearranging Furniture)

Use the Direct Selection Tool (press A) to click and drag any anchor point. Move it where you want. No mess, no stress.

Adding or Removing Anchor Points (Fine-Tuning Your Path)

You can add a point by clicking anywhere on the path with the Add Anchor Point Tool.

Want to delete one? Use the Delete Anchor Point Tool and click it away.

Little tip: Keep it simple. More points = more complexity.

Turn a Path into a Selection (Yes, You Can!)

Paths can become selections in one click.

  • Open the Paths Panel (Window > Paths).
  • Click your path.
  • Click the dotted circle icon at the bottom.

Boom instant selection. Now you can mask, copy, or apply adjustments just to that area.

Cool Tricks with Paths You’ll Want to Know

Let’s level up a little.

Stroking a Path (Outlining It Like a Pro)

Want to trace your path with a brush?

  1. Pick your brush size and color.
  2. In the Paths Panel, right-click your path and hit Stroke Path.
  3. Choose “Brush” from the dropdown.

This is awesome for hand-drawn effects or outlining text.

Saving Paths for Later (Because Who Likes Redoing Work?)

Paths are temporary unless you save them.

  • In the Paths panel, double-click “Work Path.”
  • Name it something clear like “Product Outline” or “Logo Curve.”

Now it’s there even if you close the file.

Combining Multiple Paths (Path Party!)

Use the Path Selection Tool to drag and select multiple paths.

Then up top, choose Add, Subtract, or Intersect path options. It’s like Photoshop math.

Real-Life Ways to Use Paths (This Is Where It Gets Good)

Alright, you’re probably wondering, “When would I actually use a path?” Let’s get into it.

Clipping Paths for Background Removal

If you work in e-commerce or print design, clipping path services are gold.

  • Draw a clean path around the object.
  • Save the path.
  • Set it as a Clipping Path from the Paths panel menu.

Now you’ve got a background-free image that’s print-ready.

Ghost mannequin edits for fashion shots

For apparel brands, using a ghost mannequin service provider makes your products stand out cleanly—like they’re floating, without distraction.

Mastering client education in photo editing

It also helps to understand how to guide clients through the editing process. This mastering client education guide is a great resource if you’re freelancing or managing expectations.

Put Text on a Path (It Looks Fancy, Trust Me)

Want your text to follow a curve or circle?

  • Make a path with the Pen or Ellipse Tool.
  • Choose the Text Tool.
  • Hover over the path until the cursor changes.
  • Click and start typing.

It’s perfect for logos, badges, and modern layouts.

Final Thoughts: It’s Just a Path, Not Rocket Science

If paths seemed intimidating before, I hope now they feel more like old friends. It’s really just connecting dots and shaping curves. Like sketching with a plan.

And once you get the hang of it, you’ll wonder how you ever designed without them. Start small, make mistakes, play around. That’s how I learned—one crooked path at a time.

FAQs

Q1: What’s the fastest way to make a path in Photoshop?
Use the Shape Tools in “Path” mode for perfect, instant paths—great for beginners.

Q2: Can I turn any shape into a path?
Yep! Just use the Path mode when drawing, or convert a shape layer into a path.

Q3: Is the Pen Tool hard to use?
At first, maybe. But give it 20 minutes and a few coffee breaks—you’ll get the hang of it.

Q4: Why should I use a path instead of the Lasso Tool?
Paths are way more precise and reusable. Lasso’s quick, but paths are cleaner.

Q5: Can I export paths to Illustrator?
Absolutely. Copy your path in Photoshop, then paste it directly into Illustrator as a vector shape.

,

How to Create a Clipping Path in InDesign (Even If You’re Not a Pro)

How to Create a Clipping Path in InDesign

Let’s be real when I first tried using a clipping path in InDesign, I had no clue what I was doing. I thought, “Do I really need this?” Turns out, yes. If you’re working on a layout where images need to blend in perfectly think catalogs, magazines, or flyers — this little trick can save you hours and make you look like a pro, even if you’re not there yet.

Let’s Start with the Basics: What’s a Clipping Path?

Here’s the short answer: A clipping path is like a cookie cutter for your image. It tells InDesign what part of the image should show and what should stay hidden.

It’s a path usually made with vector lines that wraps around the subject. Everything outside that path? Gone. Think of it like trimming a photo with scissors, but digitally.

Snippet-worthy: A clipping path removes background clutter so your image fits seamlessly into your layout.

Why Would You Even Need One in InDesign?

Make Your Design Look Cleaner

If you’re dropping images into a layout and don’t want a messy background ruining the vibe, clipping paths are your best friend. They help your photos sit just right on the page.

Snippet-worthy: Clipping path services help isolate your subject, giving your designs a polished, professional look.

Get That Magazine-Style Text Wrap

Ever noticed how text in magazines flows around a person or object so naturally? That’s clipping path magic.

Snippet-worthy: Use clipping paths in InDesign to wrap text around images like a professional designer.

Control What Shows (and What Doesn’t)

Need to hide parts of a logo or product shot? A clipping path gives you total control no cropping needed.

Before We Begin: Prepping Your Image

Quick Detour into Photoshop Land

Okay, quick side note. If you want clean paths, sometimes it’s better to draw them in Photoshop first. Just open the image, use the Pen Tool to trace what you want, and save it.

Snippet-worthy: You can prep clipping paths in Photoshop using the Pen Tool for cleaner results in InDesign.

Save Your Image the Right Way

Make sure you save it as a PSD, TIFF, or EPS these formats keep the path info intact. If you use JPEG, it might forget the path and cause headaches later.

Now, Let’s Create a Clipping Path in InDesign

Option 1: Use a Path You Made in Photoshop

Simple Step-by-Step Walkthrough

Here’s how I do it (and trust me, it’s easier than it sounds):

  1. Drop your image into InDesign.
  2. Select it, then go to Object > Clipping Path > Options.
  3. Under ‘Type,’ choose “Photoshop Path.”
  4. Pick the path you made in Photoshop.
  5. Adjust things like Threshold and Tolerance to fine-tune the edges.
  6. Click OK—and you’re done!

Snippet-worthy: You can apply a Photoshop-made path in InDesign by choosing “Photoshop Path” under Clipping Path options.

Option 2: Use InDesign’s “Detect Edges” Tool

How to Make It Actually Work Well

Didn’t make a path in Photoshop? No worries. InDesign has a built-in “Detect Edges” option.

Here’s the trick: make sure your background is solid and different from the object. That makes detection more accurate.

Snippet-worthy: InDesign’s “Detect Edges” feature works best when your image has a clear contrast between subject and background.

Option 3: Draw the Path Yourself in InDesign

Channel Your Inner Artist

Sometimes you just need to take matters into your own hands.

  1. Use the Pen Tool to draw around the object.
  2. Select both the image and the path.
  3. Go to Object > Clipping Path > Options, and select “User-Defined.”

Boom. Instant custom path.

Snippet-worthy: You can manually create clipping paths in InDesign using the Pen Tool and the Object > Clipping Path settings.

Looking for Professional Help?

If DIY clipping paths feel overwhelming or you need more advanced edits like invisible mannequins or product cleanups, professional services can save you time and ensure pixel-perfect results.

Getting Fancy: Advanced Clipping Tricks

Use Compound Paths for Creative Effects

Want to place a photo inside multiple shapes or a custom design? Compound paths let you do that. Just draw the shapes, select them, and go to Object > Paths > Make Compound Path.

Snippet-worthy: Use compound paths in InDesign to create complex image frames or multi-shape masks.

Put Images Inside Text (Yes, Really)

This one’s a personal favorite. Turn your headline into an image frame.

  1. Type your text.
  2. Convert it to outlines: Type > Create Outlines.
  3. Paste an image inside.

It’s perfect for poster designs or bold magazine layouts.

Fixing the Little Things That Bug You

Tweak Anchor Points Like a Boss

Use the white Direct Selection Tool to click on and drag individual anchor points. This helps clean up jagged edges.

Snippet-worthy: Adjust anchor points in InDesign with the Direct Selection Tool to refine your clipping path.

Feather the Edges for Soft Transitions

A hard edge can sometimes feel… well, too hard. Feathering helps blur the edge just slightly so it blends better.

  1. Select your image.
  2. Go to the Effects panel.
  3. Add a feather radius. Start small!

Add Some Effects for Polish

Try adding drop shadows or glow effects after clipping. It adds dimension and makes your design pop.

Real Talk: What to Watch Out For

Don’t Overthink the Path

You don’t need to trace every tiny detail. In fact, simpler paths often look cleaner and load faster in InDesign.

Snippet-worthy: Keep clipping paths simple to avoid clutter and ensure better performance in InDesign.

Blurry Images = Bad Vibes

This one stings. I’ve done layouts with gorgeous paths… only to realize the image is pixelated. Always use high-resolution files (300 DPI is the sweet spot).

Final Thoughts: It’s Not About Perfection

Look, you don’t need to be a Photoshop wizard or InDesign guru to nail clipping paths. Like most things in design, it’s about trying stuff, messing up, and learning as you go. Every time I use clipping paths, I feel a little more in control of my layout and that’s a win in my book.

FAQs About Clipping Paths in InDesign

Q1: Can I remove a clipping path later if I mess up?
Yes! Go to Object > Clipping Path > Options and choose “None.” It’s like an undo button for paths.

Q2: What image format is best for clipping paths in InDesign?
PSD and TIFF are great because they keep your path data intact. Avoid JPEG if possible.

Q3: Can I clip images inside shapes other than rectangles?
Totally. Just draw any shape and place the image inside. You can even make it a star or a custom blob.

Q4: Is “Detect Edges” always accurate?
Not really. It works best when the object stands out clearly from the background. Otherwise, it gets a little confused.

Q5: What if I want to use the same path in another project?
Save the image with the clipping path in Photoshop. Next time you use it in InDesign, it’ll remember the path.

,

How to Use the Pen Tool

How to Use the Pen Tool

If you’ve ever opened Illustrator or Photoshop and seen that strange ink-pen icon and thought, “What does that even do?”  oh, I’ve been there.

The Pen Tool feels like learning to ride a bike all over again awkward at first, but once it clicks, it’s smooth sailing. So let me break it down in a way that actually makes sense. Like, real-life, “just tell me what to click” kind of help.

What’s the Pen Tool, Really?

In short? It’s your best friend for drawing clean, crisp shapes and lines.

You use it to create paths lines made from anchor points (little dots) that can be straight or curvy. Think of it like playing connect-the-dots, but you get to control the curves between the dots.

This is the tool behind most logos, vector art, and perfect cut-outs in Photoshop. No fuzz, no pixelation. Just clean lines. If you’re planning to make precise selections for background removal or cut-outs, mastering this tool is key.

Answer: The Pen Tool is used to draw precise, scalable vector paths using anchor points in design software like Illustrator or Photoshop.

Why the Pen Tool Feels So Tricky at First

I’ll be honest when I first tried it, I hated it.

It felt like I was battling a robot that wouldn’t listen. But here’s the thing: it’s not broken. It’s just different. The Pen Tool is like using chopsticks for the first time you fumble at first, but then it clicks.

Most people expect it to work like a pencil, but it’s more like a string you’re shaping one point at a time.

Answer: The Pen Tool feels hard at first because it works with anchor points and curves, not like freehand drawing.

Getting Started Without the Overwhelm

Let’s keep it simple. Here’s what to look for.

Where to Find It

In Illustrator or Photoshop, look to the left-side toolbar. It looks like an old-school fountain pen nib. Hit the “P” key for the shortcut.

Answer: You can access the Pen Tool by pressing “P” or clicking the pen icon in your toolbar.

Want to see this in action? Check out our Clipping Path Tutorial.

What It Looks Like

When you hover over your canvas, your cursor becomes a pen tip. Click once to create a dot (that’s an anchor point). Click again to create a line.

If you drag while clicking? You create a curve. More on that soon.

Drawing Basics: Lines, Points, and Curves

Straight Lines Are Just Clicks

Click once for the starting point, click again somewhere else to make a straight line. Keep clicking to continue the path. Easy.

Want to apply these skills for clipping path services? Straight lines come in handy for product edges and geometric shapes.

If you want to stop the path, just press Ctrl (Cmd on Mac) + Click anywhere on the canvas.

Answer: To make straight lines, just click once per point without dragging.

Curves: The Art of Dragging Just Right

This is where people freak out, but hang in there.

Click and drag to make a curve. The direction and length of your drag control the curve’s shape. It’s like stretching a rubber band between two points.

Answer: To draw a curve, click and drag; the direction and distance control the curve.

Anchor Points Explained Simply

Each point tells your path where to go. Straight ones just connect lines. Curved ones have “handles” that control the direction and strength of the bend.

Professionals at our clipping path service company use anchor points to create clean, scalable paths for high-quality image cut-outs.

Think of handles like puppet strings that you can pull to change how the path behaves.

Answer: Anchor points define a path’s direction; handles on them shape curves.

Let’s Talk About Handles

Handles are your superpower once you understand them.

What Are Handles?

When you make a curved anchor point, two little arms pop out those are handles. They control the slope of the curve coming out of that point.

Answer: Handles control the curve direction and strength coming from an anchor point.

How to Move and Adjust Them

Hold down Alt (Option) and drag a handle to move it without messing up the whole curve. It takes some getting used to, but once it clicks, you’ll fly.

Curious about advanced Pen Tool techniques? You’ll love our guide on how to use the Pen Tool in Photoshop.

Answer: Use Alt/Option to adjust one handle independently for fine-tuning curves.

Common Mistakes We All Make

I’ve made them all, so you don’t have to.

Too Many Points Syndrome

People think more points = better shape. Nope. Less is more. The fewer anchor points you use, the smoother your shape will be.

Answer: Using fewer anchor points creates smoother curves and simpler paths.

Overthinking Curves

Don’t try to make the perfect curve in one go. Place a few points, then adjust the handles. Trust me it’s easier that way.

Answer: Place anchor points first, then fine-tune curves using handles afterward.

Real-World Uses for the Pen Tool

So, what can you actually do with it?

Tracing Images for Clean Vectors

Ever had a photo and wanted a cleaner version of a shape in it? Import the image, lower its opacity, and trace it with the Pen Tool.

It’s like digital tracing paper super satisfying.

Answer: Use the Pen Tool to trace over images and create sharp vector outlines.

Making Custom Icons or Logos

This is where it shines. You can draw scalable logos that look crisp no matter the size. No blurry pixels, ever.

Answer: The Pen Tool helps create vector-based icons and logos that stay sharp at any size.

Creating Masks in Photoshop

Want to cut someone out of a background cleanly? Use the Pen Tool to draw around them, then convert the path into a selection. It’s essential in high-end photo retouching services.

Answer: Use the Pen Tool to create precise cut-out masks in Photoshop.

Tips That Changed the Game for Me

Here’s what I wish someone told me sooner.

Practice on Simple Shapes First

Try tracing squares, triangles, circles. You’ll start to “get” how the handles work when the shapes are predictable.

Answer: Practice on basic shapes to learn how paths and curves behave.

Use Zoom Like a Pro

Zoom way in to place anchor points more precisely. The closer you look, the cleaner your work.

Answer: Zoom in while placing points for better accuracy and cleaner paths.

Don’t Fear the Undo Button

Ctrl+Z (Cmd+Z on Mac) is your best friend. I probably hit it 1,000 times a day. It’s part of the process, not a mistake.

Answer: Use undo freely—it’s part of learning and perfecting your design.

Wrapping It Up

Learning the Pen Tool is like learning a new language. It’s awkward at first, but then it starts making sense and suddenly, you can say anything you want with your shapes.

Start slow. Trace easy stuff. Mess up a bunch. But stick with it. One day, you’ll draw something and realize, “Hey, that felt… easy.” That’s when you know you’ve got it.

Bonus: Need Clean Product Edits?

Want to apply your Pen Tool skills professionally or outsource the task? Our team offers multiple clipping path service, ghost mannequin services, and product photo retouching services to meet every eCommerce need.

FAQs
Is the Pen Tool only in Illustrator?
Nope! It’s in Photoshop, InDesign, and most vector tools like Figma and Affinity Designer too.
Can I edit a path after drawing it?
Yes, you can move anchor points, adjust handles, and reshape any path later.
Why won’t my path close?
Make sure you click directly on the first anchor point to close the loop.
What’s the best way to get better with it?
Daily practice—even 5–10 minutes of tracing something can make a big difference.
Can beginners learn the Pen Tool quickly?
Absolutely. Start small, practice often, and use Ctrl+Z like it’s your sketchpad’s eraser.

,

What is Clipping Path in Photoshop

What is Clipping Path in Photoshop

Ever wondered how people get those clean product photos with no background?

Here’s the short answer: It’s done using something called a Clipping Path in Photoshop.

If you’re like me, the first time you opened Photoshop, it probably felt like walking into a spaceship. So many tools, buttons, panels—it’s a lot. But over time, you pick up tricks that change everything. The clipping path is one of those game-changers, especially if you work with photos, design, or e-commerce.

Let me break it down like I would for a friend.

What Exactly Is a Clipping Path?

A clipping path is a way to cut out part of an image using the Pen Tool in Photoshop.

Imagine tracing around a sticker with a craft knife. That’s what you’re doing—digitally. You draw a path around the subject, then tell Photoshop, “Only show me what’s inside this line.” The rest? Gone like magic.

I remember my first clipping path. It took me 45 minutes to outline a coffee mug. Now, it takes five. Like anything, practice makes perfect.

Why Is It Such a Big Deal?

In simple terms: Clipping paths make images look clean and professional.

If you run an online store, your products need to shine. No messy backgrounds. No distractions. Clean, clear, and focused. That’s where clipping paths come in. They isolate the product, letting it speak for itself.

I once edited 200 images for a client’s Shopify store. Same white background. Same clean crop. Sales went up. Not magic—just better visuals.

Who Actually Uses Clipping Paths?

Here’s a quick answer: Photographers, online sellers, designers, and anyone who works with images.

I’ve worked with clients from all over—wedding photographers, Amazon sellers, even artists. They all need one thing: clean cutouts. Whether it’s for prints, catalogs, or digital ads, clipping paths are part of the process.

If you’ve ever thought, “This image would look better without the background,” you’re already halfway there.

The Tool That Makes It Happen: The Pen Tool

To create a clipping path, you’ll use the Pen Tool in Photoshop.

Don’t let it scare you. At first, it feels like using chopsticks with your non-dominant hand. But it’s surprisingly powerful. Each click adds an anchor point. Drag a little? You’ve got a curve.

Just remember: The fewer points, the smoother the path.

Pro tip: Zoom in to at least 200%. Your path will thank you.

Different Types of Clipping Paths (Yes, There’s More Than One)

Basic Clipping Path is for simple shapes—think boxes, books, or anything with straight edges.

Complex Clipping Path handles curves and holes, like a bike wheel or a necklace with loops.

Compound Paths involve multiple outlines, perfect for editing cutouts with holes (like inside letters “O” or “A”).

Multi-layer Clipping Path lets you separate different parts of the image—great if you want to edit colors or shadows individually.

Each one serves a different purpose. But the idea stays the same: isolate, clean, and control.

Clipping Path vs. Masking—What’s the Difference?

Here’s a quick way to remember:
Use clipping paths for sharp edges. Use masking for soft edges.

When I edited a model with flyaway hair, the clipping path didn’t work. It made her look like she had helmet hair. But with masking, I could blend the hair into a new background seamlessly.

So, if you’re cutting out a wine bottle? Clipping path. A person with curly hair? Go for masking.

Let’s Walk Through the Process (Step-by-Step)

Here’s how to create a clipping path like a pro:

1. Open Your Image

Simple. Open the photo you want to edit in Photoshop.

2. Select the Pen Tool

Press P on your keyboard. Make sure the top menu says “Path,” not “Shape.”

3. Start Drawing

Click to add anchor points around the subject. Click and drag for curves. It’s like connect-the-dots, but cooler.

4. Close the Path

Make sure your last point connects to your first. That completes the loop.

5. Convert the Path to a Selection

Go to the Paths panel, right-click the path, and select “Make Selection.” Boom—you’ve isolated your object.

Common Mistakes to Avoid (I’ve Made Them All)

  • Too many anchor points = jagged lines.
  • Not zooming in = sloppy edges.
  • Forgetting to feather = harsh cutouts.
  • Using auto tools when precision is key.

Trust me, we’ve all been there. But every mistake teaches you something.

Tips for Clean, Pro-Level Cutouts

  • Use fewer, smarter anchor points.
  • Always zoom in while tracing.
  • Work slowly—speed comes with experience.
  • Use a graphic tablet if you can. Total game-changer.

And if something looks off? Undo and try again. No shame in that.

Why Not Just Use Magic Wand or Quick Selection?

Short answer: They’re fast but not accurate.

Magic Wand is okay for solid backgrounds, but it often leaves weird edges. Clipping paths take longer but give you pixel-perfect control.

It’s the difference between fast food and home-cooked.

Why Clipping Path Matters for E-commerce

Product photos sell. That’s a fact.

If your item has a messy background, people won’t trust it. I’ve seen this firsthand. After switching to clipping paths and white backgrounds, a client saw their conversion rate jump 30%.

Clean photos build trust. Trust builds sales.

Helpful Tools to Speed Things Up

  • Wacom Tablets – Great for smoother hand tracing.
  • Photoshop Actions – Save your steps and repeat them with one click.
  • Plugins like GuideGuide – Helps with alignment and symmetry.

You don’t need fancy gear, but the right tools save time and stress.

So, Should You Learn It or Outsource It?

If you do it occasionally, learning is worth it. But if you have hundreds of images to edit, consider outsourcing.

There are tons of professional services (like this clipping path service provider) that offer pixel-perfect clipping paths—often within hours and at low cost.

Final Thoughts: It’s Worth Learning

At the end of the day, clipping path isn’t just a Photoshop skill—it’s a tool that gives you control over how your visuals look and feel.

It’s one of the first things I learned when I got into image editing. And even now, after a thousand cutouts, I still love how satisfying it is to isolate an object cleanly.

So if you’re curious, go ahead and try it. You might just fall in love with the process.

FAQs

1. What is a clipping path used for in Photoshop?

A clipping path is used to isolate an object from its background, giving you full control over how the image appears.

2. Is the Pen Tool hard to use?

At first, yes—but with practice, it becomes second nature. Just take your time.

3. Can I use auto tools instead?

You can, but they often leave rough edges. For clean, professional cutouts, the Pen Tool and manual clipping paths are better.

4. What’s better: Clipping path or masking?

Use clipping paths for solid objects with sharp edges. Use masking for soft or fuzzy edges like hair.

5. Do I need expensive tools to do clipping paths?

Nope! All you need is Photoshop and a mouse. A graphic tablet helps, but it’s not a must-have.

How to Combine Paths in Photoshop

How to Combine Paths in Photoshop

Ever find yourself drowning in anchor points while editing a product photo? Yeah, I’ve been there too. Let me walk you through how to combine paths in Photoshop a simple move that can save your sanity and speed up your workflow.

What Are Paths in Photoshop?

Quick Definition for Beginners

In Photoshop, a path is a line or shape made with anchor points. Think of it like a wire frame you draw around something. You don’t see it in the final image, but it tells Photoshop where to act—like where to cut or where to apply an effect.

Quick answer: Want a deeper dive? Here’s a full guide on what a path is in Photoshop.

Why Paths Matter in Real Projects

I use paths almost every day for clipping product photos. They’re precise, clean, and let me tweak edges without damaging the original image. If you’re editing for eCommerce or fashion, mastering paths is a must.

Types of Paths You Can Combine

Work Paths

These are temporary paths that Photoshop makes. They’re great for quick edits but disappear if you don’t save them.

Shape Paths

These are vector paths that define shapes. You can combine them to make complex logos or icons.

Clipping Paths

Used mostly for isolating objects, especially in product photography. Clients love them because they make images web-ready.

Why Combine Paths Anyway?

A Real-Life Story: Saving Time on Product Edits

Once, I had a batch of 50 shoe photos. Each had laces, shadows, and edge highlights. Creating separate paths was messy. Combining them gave me one clean, editable shape like wrapping all your groceries in one bag instead of juggling five.

Learn how to reshape and cut out product images the right way.

Short answer: Combining paths helps you manage complex selections and speed up repetitive edits.

Common Use Cases

  • Merging two shapes into one
  • Creating cutouts with multiple parts
  • Building masks for advanced retouching

Tools You Need to Combine Paths

Pen Tool

The trusty Pen Tool is your main weapon. It creates the paths you’ll later combine. I call it the scalpel of Photoshop sharp and precise.

Path Selection Tool

This lets you move, select, or combine paths. Shortcut: Press A on your keyboard. You’ll use it a lot.

Step-by-Step: How to Combine Paths in Photoshop

Step 1: Open the Paths Panel

Go to Window > Paths. This is your control center. If it’s not visible, you won’t get far.

Quick tip: Always name your paths so you don’t mix them up later.

Step 2: Select the Paths You Want to Merge

Hold down Ctrl (Cmd on Mac) and click each path in the Paths panel. They’ll highlight together.

Note: This only works if the paths are saved—not temporary Work Paths.

Step 3: Use the Combine Button

Go to the Path Operations in the top toolbar (it appears when you select paths). Choose “Combine Shapes.” Boom! One unified path.

Shortcut alert: You can also right-click and pick “Combine Shapes” from the menu.

Step 4: Save or Convert Your Path

After combining, you can turn it into a selection (Ctrl/Cmd + Enter) or a vector mask. Always save it in the panel if you plan to reuse it.

Bonus Tip: Combine Without Losing Shapes

Use Shape Layers Instead of Raster

When working with shapes, always check that they’re on vector shape layers. Combining raster paths is like trying to glue sand together—messy and irreversible.

Pro move: Use the Shape Tool + Path Operations for cleaner results.

Common Mistakes to Avoid

Forgetting to Save the Path

Work Paths disappear if you click away. Right-click > “Save Path” every time. It’s like hitting “Save” on a Word doc.

Merging Paths in the Wrong Order

Photoshop follows the order you select paths. Choose them in the sequence you want them to merge or else you might lose smaller details.

Pro Tips from My Editing Desk

Grouping Paths for Future Use

Group your paths in folders (Layer Groups) and name them clearly. I name mine after clients or project types: Shoes_MainPath, Sunglasses_EdgeCut, etc.

Keyboard Shortcuts That Save You Hours

  • A = Path Selection Tool
  • Ctrl/Cmd + Enter = Convert Path to Selection
  • Alt/Option + Click = Subtract a Path
  • Shift + Click = Add to Path

Final Thoughts

Combining paths in Photoshop is one of those small skills that makes a big difference. Once you’ve done it a few times, it feels as natural as brushing your teeth. And trust me, your workflow will thank you.

Whether you’re prepping photos for Amazon, creating logos, or just trying to clean up a messy shape—you’ll be glad you learned this trick.

FAQs

Q1: Can I undo a combined path?
Yes! Just press Ctrl + Z (Cmd + Z) to undo immediately. Or go to Edit > Step Backward.

Q2: Does combining paths reduce quality?
Nope. Paths are vectors, so combining doesn’t affect resolution or sharpness.

Q3: Can I combine a path with a selection?
Sort of. Convert your path to a selection first, then modify it. But technically, paths and selections are different things.

Q4: What happens if my path disappears after combining?
You probably didn’t save it. Always hit “Save Path” before combining to keep a backup.

Q5: Is this different from merging shape layers?
Yes! Merging shape layers flattens them. Combining paths keeps them editable and non-destructive.

What Is a Path in Photoshop? (And Why It’s Your Secret Design Superpower)

What Is a Path in Photoshop

You know that moment when you’re trying to cut something out in Photoshop and it turns into a jagged mess? Yeah, I’ve been there too. It’s frustrating, right? That’s when I discovered paths—and let me tell you, it changed everything.

So, here’s the quick answer:
A path in Photoshop is a smooth outline made of anchor points and curves. It’s used to create clean shapes, selections, or guides without messing with the actual image.

Now, let me walk you through it like I would if we were chatting at a coffee shop. Promise it’ll be simple, clear, and maybe even a little fun.

The First Time I Used Paths (and Totally Screwed Up)

The first time I opened the Pen Tool, I thought, “What even is this thing?” I clicked once, then again, and suddenly there were weird handles everywhere. I panicked. Closed Photoshop. Drank tea.

But here’s what I didn’t know: paths are like the pencil outlines you draw before painting. They don’t change anything just guide your edits. That means no pressure. You can mess up all you want, and nothing breaks.

Why Paths Are So Dang Useful

Let’s keep it real Photoshop has about 300 tools, and most of them feel like overkill when all you want is a clean outline. But paths? They’re your go-to for three big reasons:

1. Super Precision

Quick tip: If you need perfect curves or straight lines, paths are the way. Unlike the lasso or quick selection tools, you’re not guessing. You control every point.

2. No Pixel Damage

This is a lifesaver. You can move, reshape, delete without harming your image. It’s like having a sketch layer in your digital art that never touches your final design.

3. Crazy Versatile

Paths work with text, shapes, masks, selections… they’re like duct tape for designers. You can use them to build logos or shape a model’s hairline perfectly.

So, What Tools Actually Make Paths?

Let’s demystify the toolbar. When you’re dealing with paths, these are your BFFs:

Pen Tool (a.k.a. The MVP)

  • Regular Pen Tool: Click to make straight lines. Click and drag for curves. It’s precise, like plotting a treasure map.
  • Free form Pen Tool: This one’s for the sketchers. Just draw like you’re using a pencil Photoshop cleans it up for you.

Path Selection Tool

Click a path to move it. Think of it like picking up a cutout and sliding it across the table.

Direct Selection Tool

This one lets you move the dots (anchor points) and curves one by one. Super handy for tweaking just a corner or curve.

Types of Paths (Yep, There’s More Than One)

This tripped me up for a while. Not all paths are created equal. Here’s a cheat sheet:

  • Work Path: Temporary. Great for quick experiments. But save it, or it’s gone when you blink.
  • Saved Path: Permanent. Click the Paths panel > double-click your path > name it. Done.
  • Clipping Path: If you’re sending stuff to print or exporting to In Design, this one hides parts of the image outside the path.

Photoshop paths can be temporary (work paths) or saved (named paths), and can even act as masks (clipping paths).

How to Make a Path (Step-by-Step, No Headaches)

Okay, let’s walk through this slowly:

  1. Pick the Pen Tool (shortcut = P).
  2. Click your first anchor point.
  3. Click again to make a line. Want a curve? Click and drag.
  4. Keep clicking until you’ve drawn your shape.
  5. Close it by clicking the first point or hit Esc to leave it open.

Boom! You’ve got a path.

Editing a Path (Like a Pro)

Here’s where the magic happens. You can change every dot and curve. It’s like sculpting with invisible clay.

  • Need more points? Use the Add Anchor Point Tool.
  • Too many points? Trim it with the Delete Anchor Point Tool.
  • Curves a bit off? The Direct Selection Tool lets you drag those handles for perfect arcs.

Hold Ctrl (Cmd on Mac) to temporarily switch to the Direct Selection Tool. It’s a great shortcut when editing paths.

Want a Selection Instead? Convert That Path

One of my favorite Photoshop hacks: Right-click the path and choose “Make Selection.” You get a super clean selection, way better than the Magic Wand or Lasso tools.

Great for cutting things out or creating detailed masks without jaggy edges.

Put Text on a Path (This Is So Cool)

Ever wanted text to wrap around a circle or zigzag like a lightning bolt? Paths make that happen.

  • Draw your path first.
  • Select the Text Tool, hover over the path, and click.
  • Now just start typing.

It looks professional and is way easier than it sounds.

Paths vs. Layers vs. Masks (Here’s When to Use What)

If you’re confused about when to use a path, a layer, or a mask—join the club. Here’s the breakdown:

  • Use a Path when you want control and precision.
  • Use a Layer Mask when you want to hide parts of a layer without deleting them.
  • Use a Vector Mask when you need sharp, scalable shapes.

Paths offer control, layer masks offer flexibility, and vector masks offer sharpness. Choose based on what you need.

Common Mistakes (So You Don’t Have to Make Them)

Let’s save you some frustration:

  • Not saving work paths: Always double-click and name it!
  • Too many anchor points: Less is more. Your path will look smoother.
  • Wrong selection tool: Direct Selection = edit points. Path Selection = move the whole thing.

Tips From My Sketchbook

Here are a few things I wish I knew earlier:

  • Zoom in. The closer you get, the better you place points.
  • Hold Shift to snap angles or keep lines straight.
  • Use guides. They’re your secret weapon for symmetry.

In a Nutshell: Paths Are Photoshop’s Power Tool

If you want to level up in Photoshop, learning paths is a must. They’re clean, flexible, and give you control that other tools just can’t. They take some practice, but once it clicks, it clicks.

Just like learning to ride a bike—it feels weird at first, but soon you’re cruising.

FAQs

  • What exactly is a path in Photoshop?
    A path is a smooth outline made of anchor points and curves, used for shapes, text, or selections without altering pixels.
  • How is a path different from a shape?
    A path is just the outline. A shape includes fill and stroke and sits on its own layer.
  • Can I turn a path into something printable?
    Yes! Use clipping paths for print layouts or define a custom shape from your path.
  • What if I lose my path?
    Check the Paths panel. If it’s a work path and not saved, it might be gone. Always save important paths!
  • 5. Do I need a drawing tablet to use paths well?
    Not at all! Paths are about clicking and dragging, not drawing freehand. A mouse works just fine.
,

How to Draw Multiple Lines in Photoshop

DRAW MULTIPLE LINES IN PHOTOSHOP

Introduction

Let me tell you a quick story.

A few years ago, I had a client who sold handmade jewelry online. Her product photos were beautiful, but the cluttered backgrounds? Not so much. We worked together on editing her images with clipping paths and pure white backgrounds. Within a month, her sales doubled. Not because the jewelry changed but because the photos finally did them justice.

Professional image editing, like clipping paths, makes products stand out and boosts sales by enhancing visual clarity.

What Is Multiple Lines in Photoshop and Why It Matters

Think of a clipping path like a pair of scissors in Photoshop. It’s how we trace around an object, cut it out cleanly, and place it wherever we want—like magic scissors, but for pixels.

Why does this matter? Well, if you’re selling anything online, your photos are your first impression. You wouldn’t show up to a job interview in pajamas, right? The same goes for your product images.

A clipping path cleanly removes a background, creating polished product photos perfect for eCommerce platforms.

My Experience With Multiple Lines in Photoshop

I’ve been working with photo editing for [X] years now, and I’ve seen the difference it makes especially in e-commerce and advertising. I remember one time a real estate agent sent me property images that were dull and full of shadows. After some background cleanup and shadow adjustments, his listings looked like magazine spreads.

Real-world editing helps photos feel professional, trustworthy, and ready for any platform especially when it’s done by hand.

Who Needs This? (And Why It’s a Game Changer)

If you’re a:

  • Photographer
  • Online seller
  • Digital marketer
  • Print designer

you’ve probably struggled with messy backgrounds, inconsistent lighting, or that one annoying object you wish wasn’t in the shot. This is where services like clipping paths, background removal, or retouching save the day.

Clipping path services are ideal for anyone who wants clean, professional images without distractions.

Behind the Scenes: How It’s Done

We use the Pen Tool in Photoshop to carefully trace the edges of the subject. It’s not AI magic it’s hand-drawn precision. Yes, it takes time. Yes, it’s worth it.

And no, quick auto tools don’t always cut it. Trust me, I’ve fixed too many “auto-clipped” disasters to count.

Clipping paths are hand-drawn for precision unlike quick auto tools, they deliver clean, sharp results every time.

Real Results: Before and After Stories

I once worked on a batch of 500 images for a fashion brand’s new season launch. The original photos had inconsistent lighting and rough cutouts. After clean clipping paths, consistent shadows, and a pure white background, their online catalog looked like it came straight out of Vogue.

They emailed me later saying their return rate dropped because customers finally saw the product as it really was.

Better visuals not only attract customers they build trust and reduce product returns.

Common Mistakes to Avoid

One big mistake? Relying too much on AI. Don’t get me wrong AI is great for speed. But when it comes to product images, you still need a human eye. Also, don’t forget shadows! Removing them completely can make your product look like it’s floating.

Avoid overusing AI or removing all shadows photos should feel clean, not fake.

Let’s Keep It Simple: Key Takeaways

  • Clipping paths help isolate and enhance your product.
  • Manual editing always beats sloppy automation.
  • Consistent visuals improve trust and conversion.
  • Invest in quality your brand deserves it.

Clean product images are a smart investment they improve trust, brand image, and sales.

Final Thoughts: From Me to You

If you’re still unsure whether you need this, here’s what I’ll say—your product is already great. Let’s make sure your photos show that. You don’t need fancy equipment. Just the right edits.

I’ve helped everyone from solo Etsy sellers to large brands. And if there’s one thing I’ve learned? Clean visuals speak louder than words.

Sometimes, all your product needs to shine is a little editing love from someone who gets it.

FAQs

What is a clipping path?
A clipping path is a way to cut out an object from a photo using a manual tracing method in Photoshop.

How does background removal help sales?
Clean backgrounds help customers focus on the product, which increases trust and sales.

Is manual editing better than AI?
Yes, manual editing offers more precision and quality than automated tools.

How much does clipping path service cost?
Prices start from $0.25 per image, depending on complexity and volume.

,

Best Clipping Path Service for E-commerce Photos

Clipping Path Service for Ecommerce

Did you know that high quality images can increase e-commerce sales by up to 75%. In this digital age, making a good first impression is very important. That’s why we provide the best clipping path service for e-commerce photos.

The aim of our service is to enhance image quality and appeal. We ensure that every detail of your products is shown. That way your products look good against any background.

We offer bespoke image background removal services for each client. It makes visuals that attract customers.


Key Takeaways

  • Images can have a huge impact on e-commerce sales.
  • Crisp and clean images are our clipping path services.
  • It is essential to have expert photo editing to attract people to your products.
  • We provide all the tailored solutions to suit the needs of the specific client.
  • The removal of image background improves appearance and professionalism.

Understanding Clipping Path Services

A clipping path is a special shape in the world of photo editing that outlines part of an image. This is very important for the task such as changing backgrounds. This way we can pick what parts of the photo we want to see and make sure the important parts are seen.

What is a Clipping Path?

Special tools are used by editors to make clipping paths. It allows them to choose parts of an image easily. That’s great for making products look good in photos and helping them sell better online.

A lot of e-commerce photo editing uses clipping paths. They can make product images look professional enough for websites.

Importance of Clipping Path in E-commerce

The right photo can influence a customer to choose you. Clear and attractive product images are important in e-commerce where it’s very competitive. They keep customers interested and can also result in more sales.

Here, clipping paths are very important. They help make the images look sharp and polished, just what online shoppers want.

Why Choose Our Clipping Path Service

Top notch e commerce photo editing is our clipping path service. We’ve got a lot of experience and know quality. We know how important good visuals are to get customers. We are ready to help your brand with the best service possible.

Expertise in Professional Photo Editing

We have been in expert photo editing for years. We have been through this experience and thus can provide the top clipping path service for e commerce photos. We have advanced techniques to ensure all images are perfect.

This means your audience will be attracted to your product images. They’ll be key to getting your customers to engage.

High-Quality Clipping Path Definition

We pay close attention to every detail when we have a high quality clipping path. Each cutout is perfect, pixel by pixel. It allows your products to stand out in any online store.

We make sure your images look professional because of our commitment to quality. This increases your brand’s credibility and attraction.

Best Clipping Path Service for E-commerce Photos

Every detail is important in e-commerce. For e-commerce needs, we have a top notch clipping path service. Having custom product photo editing solutions available for you, we make sure each product photo will showcase your brands quality. Potential customers are grabbed by this.

Tailored Solutions for E-commerce Needs

Every business is different and we know that. That’s why we provide custom e-commerce photo editing solutions. We know your brand and your audience, so we create images that your audience will connect with. It increases your products’ visual appeal and puts you ahead of your competition.

Quick Turnaround Times for Your Business

Time is everything in e-commerce. But we’re fast, without compromising on quality. We help you meet deadlines, whether it’s for a product launch or a seasonal campaign. With our quick and quality photo editing, you always have a strong online presence and meet customer needs.

Benefits of Using Expert Clipping Path

An expert clipping path can help us greatly with our product images. In e-commerce, better product presentation is key to high quality visuals. Our brand looks good because professional photo editing makes images clear and attractive.

Enhancing Product Presentation

Our product images stand out because we are investing in expert clipping path services. The benefits include:

  • Highlights the product with clear backgrounds
  • Brighter images color correction
  • Unifying the style across all products and significantly strengthening a brand identity

It helps improve product presentation and helps us to connect with customers better.

Impact on Customer Engagement and Sales

Studies show that high-quality images attract more customers. Expert clipping path techniques lead to:

  1. More customer trust in our brand
  2. People are more likely to buy good looking products
  3. More people reached, more social media shares

These improvements have greatly improved our sales and our brand loyalty. If we concentrate on professional photo editing, we can increase our sales and keep the customers returning.

expert clipping path

How Our Photo Editing Process Works

On top of that, we have a detailed photo editing process to get top notch results. Background removal is what it is about, to make your products pop in e-commerce. It guarantees that your products are noticed.

Step-by-Step Overview

Our photo editing process has several steps:

  1. Initial Image Submission: Through our easy to use platform, clients send images to us.
  2. Image Background Removal: Removing backgrounds carefully, our experts make images look professional.
  3. Clipping Path Creation: For precise isolation, we generate exact clipping paths around products.
  4. Photo Retouching: We tweak colors, sharpen the images, we fix flaws to make it better.
  5. Final Review: We check every image to make sure it is up to our standards.
  6. Delivery: The final images are delivered quickly for any e-commerce site.

Quality Control Measures in Place

At every step we have strict quality control. Our process includes:

  • Each project is checked by a quality control team.
  • We look over images over and over again to catch and fix any issues.
  • So we use client feedback to improve our work.

We make sure images meet or exceed client expectations. It increases product visibility and sales.

Conclusion

Today’s fast moving e-commerce world cannot do without professional clipping path services. They help draw customers to what they have to offer in the best light. For a great shopping experience, it is important to choose the best clipping path service for e-commerce photos.

When you work with ExpertClippingPath, your brand gets top notch results. Each client is custom made for our photo editing. This guarantees that your visuals will be well connected to your audience.

The digital market is becoming more and more competitive. Quality clipping path services can help your products stand out when you invest in it. We can help you to show your products in the best possible way. It will arouse customers’ interest and boost your sales. If you want to know how we can help your business thrive, contact us today.